Grant a reward to users when they complete an AdMob rewarded or rewarded interstitial ad. RevenueCat verifies each reward server-side using AdMob Server-Side Verification (SSV) before granting it, so rewards can't be spoofed by a tampered client. You configure what each ad unit grants in the RevenueCat dashboard — no backend of your own required.
Verified rewards can grant in-app currency, a temporary entitlement, or both. An ad unit can have one in-app currency reward and multiple entitlement rewards at the same time — completing the ad grants all of them together.
The AdMob Adapter SDK is installed and the RevenueCat SDK is configured.
SDK minimums: purchases-ios 5.89.0+ (iOS 15+), purchases-android 10.19.0+ with the legacy AdMob adapter, purchases-android 10.23.0+ with the Next-Gen AdMob adapter, purchases_flutter 10.18.0+ with purchases_admob_flutter, react-native-purchases 10.15.0+ with the matching react-native-purchases-admob, or purchases-unity 9.15.0+ with com.revenuecat.purchases-admob-unity.
Your AdMob account is connected to RevenueCat so your rewarded ad units sync to the dashboard.
This is a single, shared endpoint — use the same URL for every ad unit. RevenueCat resolves the ad unit and the user from data the SDK attaches at show time. See Google's guide on setting up SSV for where to enter the URL.
Step 2: Configure the reward in the RevenueCat dashboard
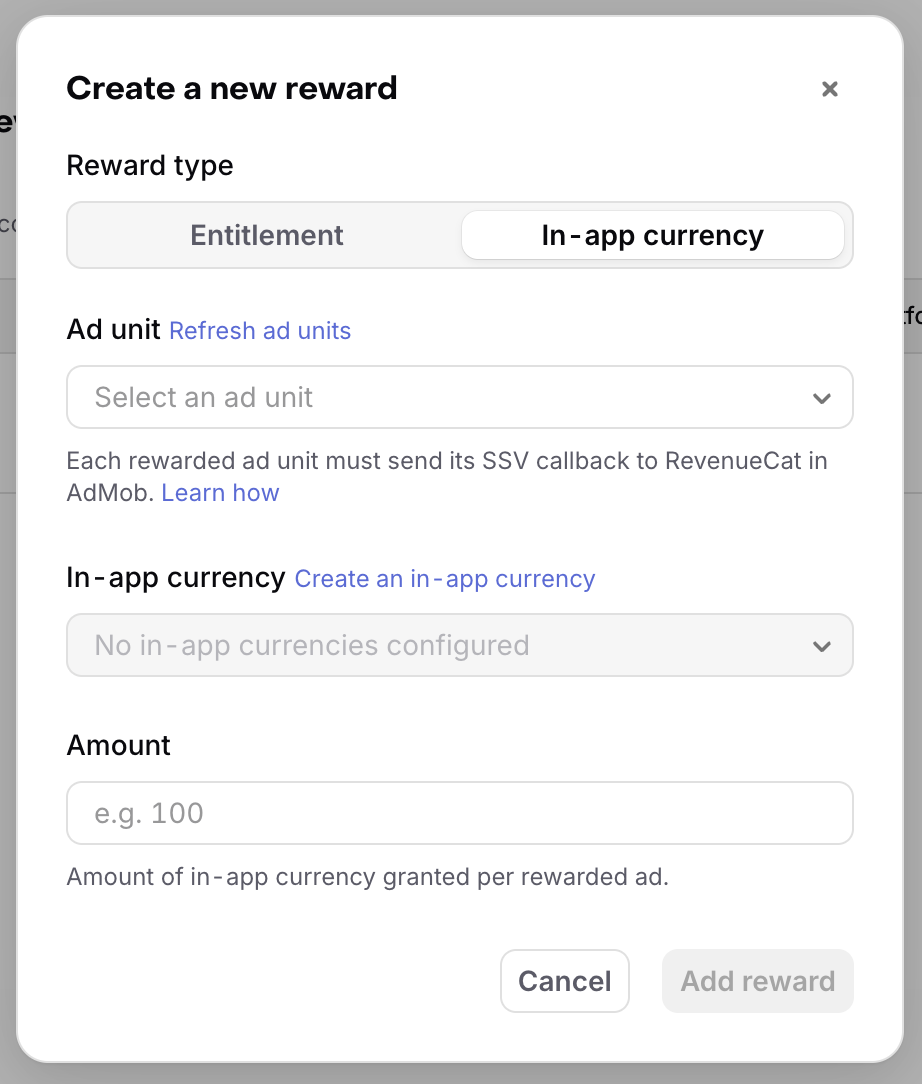
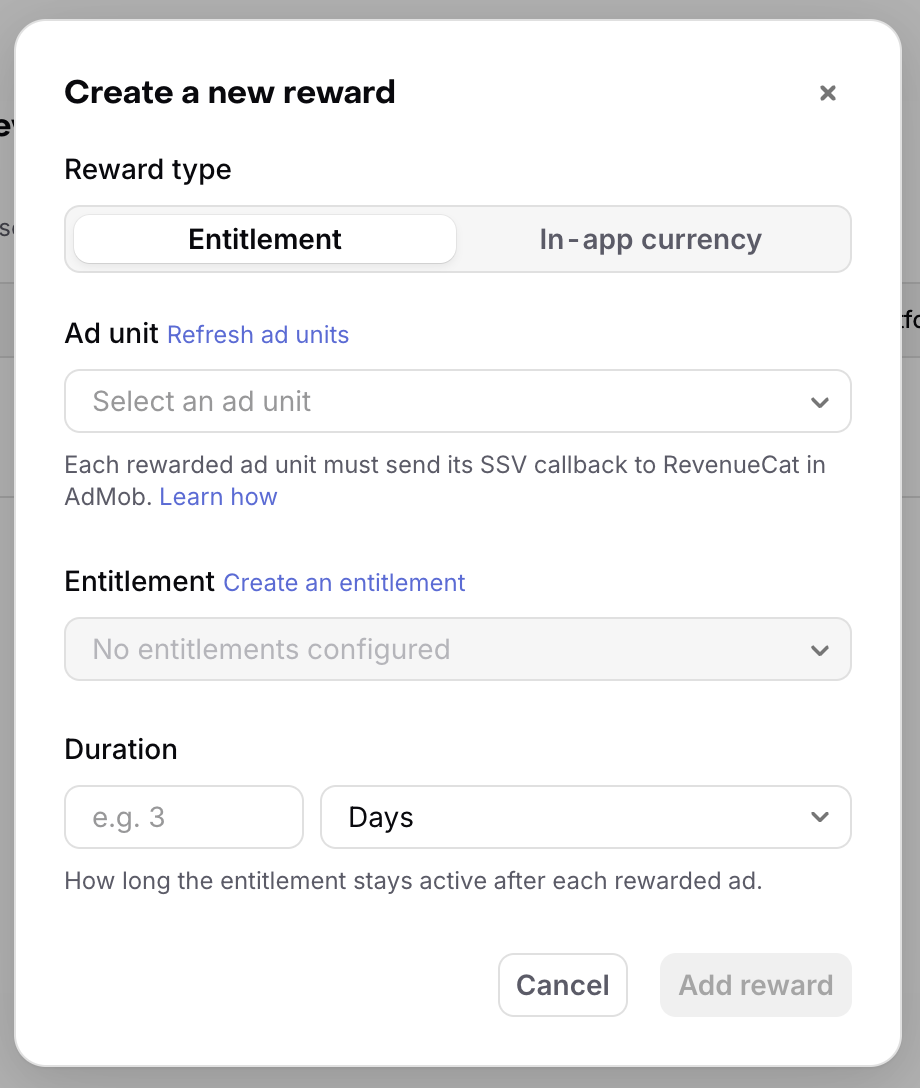
On the Rewards page (under Ads) in your RevenueCat dashboard, add a rule for each reward you want an ad unit to grant. Select New reward, then choose a Reward type in the dialog: Entitlement or In-app currency. An ad unit can have rewards of both types.
If a rewarded ad unit is missing from the Ad unit list, select Refresh ad units.
Choose the entitlement to grant. Only active (non-archived) entitlements are selectable — create one first if you don't see it in the list.
Enter a duration and pick a unit (minutes, hours, days, weeks, months, or years). The minimum duration is 30 minutes.
Select Add reward.
RevenueCat grants the entitlement for the configured duration every time a reward from that ad unit is verified. An ad unit can have multiple entitlement rewards, but only one reward per entitlement — configure another ad unit if you need different durations for the same entitlement.
⚠️Use a real ad unit
Entitlement rewards are verified through AdMob SSV, which is configured per ad unit in your own AdMob account. Google's sample test ad unit IDs aren't part of any account, so SSV can't be enabled on them.
Enable verification on each ad after it loads (on React Native, when you create it), then present it with the verification callbacks.
On iOS, you can also fetch configured rewards to describe the offer before presenting the ad, as shown in the Swift example below.
An ad can grant more than one reward at once. Verification exposes the primary reward and any additional rewards separately, so check both:
The primary reward — inspect it directly for its type.
Additional rewards — a list of the same reward type, holding everything beyond the primary reward. Empty when only one reward was granted.
Before delivering the result, the SDK already applies the reward locally: it invalidates the in-app currencies cache for any in-app currency reward, and refreshes customer info for any entitlement reward. You don't need to refresh anything yourself — refetch in-app currency balances only when your UI needs the updated total (see reading balances), and check the entitlement status as usual.
Swift
Kotlin (Legacy AdMob)
Kotlin (Next-Gen AdMob)
Flutter
React Native
Unity
importRevenueCat
importRevenueCatAdMob
let adUnitID ="AD_UNIT_ID"
// Fetch configured rewards to describe the offer before showing the ad.
let adRewards =awaitPurchases.shared.adRewards(forAdUnitId: adUnitID)
let offerTitle =formatRewardOffer(adRewards)// Your app's formatting method.
RewardedAd.loadAndTrack(
withAdUnitID: adUnitID,
request:Request(),
placement:"bonus_coins",
fullScreenContentDelegate:self
){ ad, error in
if error !=nil{return}
guardlet ad else{return}
// Enable RevenueCat reward verification before presenting the ad.
ad.enableRewardVerification()
self.rewardedAd = ad
}
// Later, present the ad with verification callbacks:
rewardedAd?.present(
from:self,
rewardVerificationStarted:{
// RevenueCat is verifying the reward server-side.
// Show a loading state here if you gate the reward on the result.
case Purchases.VerifiedReward.Entitlement entitlement:
// RevenueCat already granted the entitlement server-side and refreshed customer
// info before delivering this result — check entitlement status as usual.
Debug.Log($"Granted entitlement {entitlement.Identifier} until {entitlement.ExpiresAt}");
break;
case Purchases.VerifiedReward.NoReward _:
// Verification succeeded but the reward rule granted nothing.
break;
case Purchases.VerifiedReward.Unsupported _:
// The reward type is newer than this SDK version; update the RevenueCat package.
break;
}
}
Rewarded interstitial ads work identically — use RewardedInterstitialAd in place of RewardedAd (on React Native, createRewardedInterstitialAd in place of createRewardedAd).
On React Native, react-native-google-mobile-ads accepts server-side verification options when the ad request is created, before AdMob's response ID exists. The adapter therefore generates the impression ID itself when you create the ad with enableRewardVerification: true, attaches the token to the request, and uses that ID for every tracking event of the ad. Verification tokens are single-use: create a new ad for every verified show instead of calling load() again on the same instance; once a verified ad has loaded, a second load() logs a warning and does nothing.
The adapter also automatically tracks the reward-verification funnel — earned, verified, granted, and failed-to-verify — as events tied to the same ad it already tracks loads, impressions, and revenue for. No extra code is required. This tracking requires purchases-ios 5.89.0+, purchases-android 10.19.0+ with the legacy adapter, purchases-android 10.23.0+ with the Next-Gen adapter, or the Flutter, React Native and Unity adapters.
If you use the AdMob Adapter SDK shown above (available for iOS, Android, Flutter, React Native, and Unity), Step 3 is all you need. Otherwise — on Kotlin Multiplatform (which has no adapter), or on any platform when you integrate Google Mobile Ads directly without the adapter — do it manually, calling the reward verification methods yourself:
After the ad loads, generate a token with generateRewardVerificationToken and attach it to the ad's server-side verification options (your ad network's userId and customData fields).
Present the ad.
When the ad's earned-reward callback fires, call pollRewardVerification with the token's client transaction ID, then handle the result exactly as above (primary reward + additional rewards).
Optionally, pass ad metadata to pollRewardVerification so the SDK tracks the reward-verification funnel (earned, verified, granted, or failed to verify) the same way the adapter does automatically in Step 3 — omit it to poll without tracking. This uses the same AdMediatorName/AdFormat types as manual ad tracking, and correlates with the ad's other tracked events through a shared impressionId.
These methods are ad-library-agnostic: they only produce the userId/customData you hand to whatever server-side verification mechanism your ad SDK exposes. The examples below use an AdMob library such as google_mobile_ads (Flutter), react-native-google-mobile-ads (React Native), and the Google Mobile Ads Unity plugin (Unity). Google Mobile Ads has no Kotlin Multiplatform artifact, so on Kotlin Multiplatform loading and presenting the ad stays platform-specific — wire it behind an expect/actual pair backed by play-services-ads on Android and the GoogleMobileAds SDK on iOS; only the verification calls shown below are shared.
Additional requirements for this path:
Flutter:purchases_flutter 10.10.1+, plus your AdMob library; you wire google_mobile_ads directly instead of installing purchases_admob_flutter.
React Native:react-native-purchases 10.8.1+, plus your AdMob library; you wire react-native-google-mobile-ads directly instead of installing react-native-purchases-admob.
Unity:purchases-unity 9.9.0+, plus the Google Mobile Ads Unity plugin; you wire it directly instead of installing com.revenuecat.purchases-admob-unity.
Kotlin Multiplatform:purchases-kmp 3.9.0+, plus your platform-specific Google Mobile Ads setup.
iOS / Android:purchases-ios 5.89.0+ or purchases-android 10.19.0+; you wire Google Mobile Ads directly instead of installing the adapter.
Swift
Kotlin
Flutter
React Native
Unity
Kotlin MP
// No AdMob adapter required.
importRevenueCat
importGoogleMobileAds
RewardedAd.load(with:"AD_UNIT_ID", request:Request()){ ad, error in
if error !=nil{return}
guardlet ad else{return}
// Use the loaded ad's response ID as the impression ID, generate a token,
// and attach it to AdMob's server-side verification options before presenting.
let impressionId = ad.responseInfo.responseIdentifier ??""
let token =Purchases.shared.generateRewardVerificationToken(impressionId: impressionId)
If you handle rewards yourself without RevenueCat reward verification, use trackAdRewardEarnedUnverified to record the ad SDK's earned-reward callback. This method only tracks the event; it doesn't verify or grant a reward.
When you use the adapter's reward verification or pass tracking metadata to pollRewardVerification, the SDK already tracks this event. Don't also call it manually for the same reward.
An entitlement granted from an ad reward is no different from one granted by a subscription — it's an active entitlement in CustomerInfo with an expiration date. RevenueCat doesn't notify your app the moment it expires, so apply the same rule you already follow for subscriptions: your app decides when to check status, not RevenueCat.
Check the entitlement's active status at the point where you gate access, not once when the reward is granted and never again. A user who unlocks 30 minutes of premium access can leave the relevant screen open well past that window — if you only checked at grant time, they'd keep access after it should have ended.
Rewards earned in debug builds are treated as sandbox events.
For in-app currency, confirm a verified grant in the Customer History timeline, where it appears as an in-app currency transaction:
Opening the entry shows a VIRTUAL_CURRENCY_TRANSACTION event whose "source" is "ad_reward", which distinguishes ad-reward grants from purchases and other sources. The event also includes an ad_transaction_id matching the reward verification.
For entitlements, the grant is active as soon as verification succeeds and shows up in the customer's active entitlements — there's no separate event in Customer History yet.